Configuring Firefox ESR v52 on Mac OS: Разлика между версии
Редакция без резюме |
Редакция без резюме |
||
| (Не са показани 8 междинни версии от същия потребител) | |||
| Ред 1: | Ред 1: | ||
== Before you proceed you must do == | == Before you proceed you must do == | ||
* If you have smart card reader and smart card from | * If you have smart card reader and smart card from InfoNotary, but you didn't install the drivers for them do the following [[Installation of smart card reader and smart card drivers in Mac OS X]] | ||
* '''IMPORTANT | * '''IMPORTANT :''' In the information message "Please enter the '''master password for InfoNotary'''", enter your PIN code. | ||
* '''IMPORTANT :''' Firefox and Thunderbird use direct access to the smart card. When you have successfully installed your certificates, you '''SHOULD NOT''' delete them from there, as this will also delete the certificate, along with the private and public keys on the smart card. After that, the certificate cannot be restored and a new one must be issued. | |||
''' | * '''IMPORTANT :''' In order to use your certificate with Firefox and Thunderbird, the reader must be on your computer before opening the program. | ||
'''YOU CAN DOWNLOAD FIREFOX ESR v52 FROM [https://ftp.mozilla.org/pub/firefox/releases/52.9.0esr/mac/en-US/Firefox%2052.9.0esr.dmg HERE]''' | |||
'''The prefered way to configure Firefox and Thunderbird is through [https://addons.mozilla.org/firefox/addon/infonotary-configurator-for-mo/ InfoNotary Configurator for Mozilla]. After the extension is installed everything will be configured''' If you prefer to do it manually follow the steps: | <!--'''The prefered way to configure Firefox and Thunderbird is through [https://addons.mozilla.org/firefox/addon/infonotary-configurator-for-mo/ InfoNotary Configurator for Mozilla]. After the extension is installed everything will be configured''' If you prefer to do it manually follow the steps:--> | ||
== Install Infonotary certificate chain == | == Install Infonotary certificate chain == | ||
Before you can start using the certificate, you must install the Infonotary certificate chain. | <!--Before you can start using the certificate, you must install the Infonotary certificate chain. | ||
Certificate chain for certificates issued before 08.01.2018 - [http://www.infonotary.com/site/files/INotaryCertChain.p12 INotaryCertChain.p12]. | Certificate chain for certificates issued before 08.01.2018 - [http://www.infonotary.com/site/files/INotaryCertChain.p12 INotaryCertChain.p12]. | ||
Certificate chain for certificates issued after 08.01.2018 - [http://www.infonotary.com/site/files/InfoNotary_Qualified_eIDAS.p12 InfoNotary_Qualified_eIDAS.p12] | Certificate chain for certificates issued after 08.01.2018 - [http://www.infonotary.com/site/files/InfoNotary_Qualified_eIDAS.p12 InfoNotary_Qualified_eIDAS.p12]--> | ||
Start Firefox ESR. From the menu choose '''Preferences'''. | |||
Start '''Firefox ESR'''. From the menu choose '''Preferences'''. | |||
[[Файл:MenuFirefoxESR.png]] | [[Файл:MenuFirefoxESR.png]] | ||
| Ред 29: | Ред 30: | ||
[[Файл:Advanced.jpg]] | [[Файл:Advanced.jpg]] | ||
From here the process is analogical for all Mozilla applications. | <!--From here the process is analogical for all Mozilla applications. | ||
{{Шаблон:Installation_of_Infonotary_Certificate_Chain_for_Mozilla_applications}}--> | |||
Choose the tab '''Your certificates''' and click on '''Import'''. | |||
[[Файл:MenuFirefoxquantum2cert.png|750px]] | |||
Specify the path to certification chain - [http://www.infonotary.com/site/files/InfoNotary_Qualified_eIDAS.p12 InfoNotary_Qualified_eIDAS.p12] | |||
[[Файл:ChoosecertMac.png|500px]] | |||
Leave the field blank and click '''OK'''. | |||
[[Файл:MenuFirefoxMacEncryptPass.png]] | |||
Newly installed certificates can be found in section '''Authorities'''. | |||
[[Файл:MenuFirefoxquantum5cert.png|750px]] | |||
In Mozilla for every certificate of a Certification Authority (CA) the user must choose a level of trust. This is done by selecting the certificate and clicking on '''Edit Trust'''. The easiest way to do this setting for the certificate <!--"'''InfoNotary CSP Root'''" and/or -->"'''InfoNotary TSP Root'''" select three possible options. This will make all the InfoNotary trusted certificates for all operations. | |||
[[Файл:MenuFirefoxMacESRTrust.png]] | |||
== Install software security module == | == Install software security module == | ||
| Ред 49: | Ред 69: | ||
To add a new device, select the '''Load''' | To add a new device, select the '''Load''' | ||
[[Файл: | [[Файл:MenuFirefoxquantum2secdev.png|750px]] | ||
Change the name of the module (Module Name), as desired. | Change the name of the module (Module Name), as desired. | ||
[[Файл: | [[Файл:MenuFirefoxMacQuantumLoadModule.png]] | ||
| Ред 74: | Ред 94: | ||
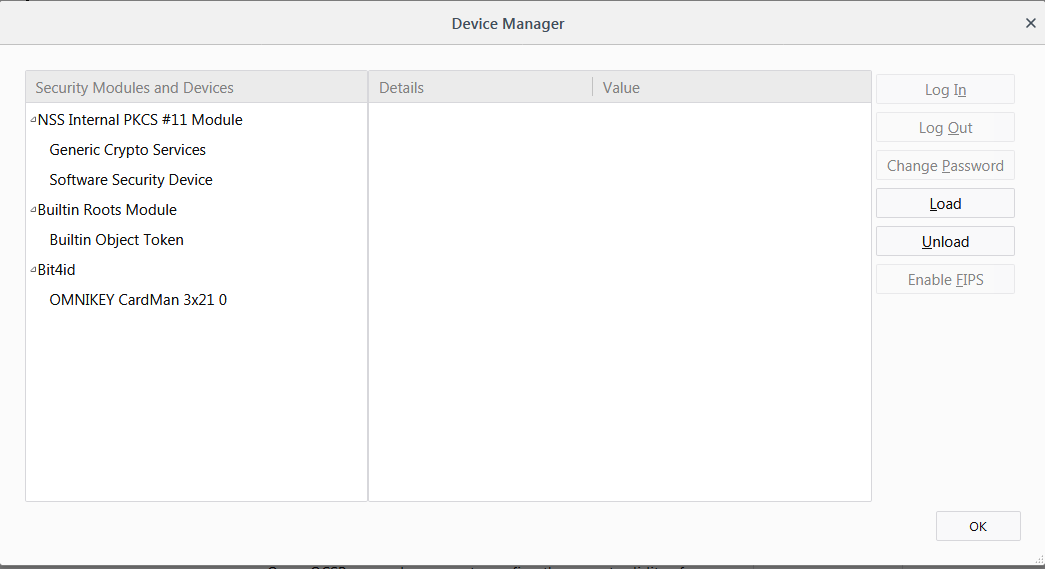
After you click '''OK''', your smart card will appear in the list of available devices. | After you click '''OK''', your smart card will appear in the list of available devices. | ||
[[Файл: | [[Файл:MenuFirefoxquantum4secdev.PNG|750px]] | ||
<noinclude> | <!--<noinclude> | ||
[[Category:Templates|{{PAGENAME}}]] | [[Category:Templates|{{PAGENAME}}]] | ||
</noinclude> | </noinclude>--> | ||
[[Категория:Инсталация и използване на удостоверения за електронен подпис]] | [[Категория:Инсталация и използване на удостоверения за електронен подпис]] | ||
[[Категория: | [[Категория:MacOS]] | ||
[[Категория:Помощ]] | [[Категория:Помощ]] | ||
Текуща версия към 14:08, 11 февруари 2021
Before you proceed you must do
- If you have smart card reader and smart card from InfoNotary, but you didn't install the drivers for them do the following Installation of smart card reader and smart card drivers in Mac OS X
- IMPORTANT : In the information message "Please enter the master password for InfoNotary", enter your PIN code.
- IMPORTANT : Firefox and Thunderbird use direct access to the smart card. When you have successfully installed your certificates, you SHOULD NOT delete them from there, as this will also delete the certificate, along with the private and public keys on the smart card. After that, the certificate cannot be restored and a new one must be issued.
- IMPORTANT : In order to use your certificate with Firefox and Thunderbird, the reader must be on your computer before opening the program.
YOU CAN DOWNLOAD FIREFOX ESR v52 FROM HERE
Install Infonotary certificate chain
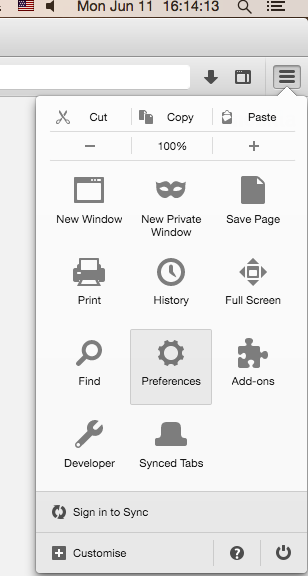
Start Firefox ESR. From the menu choose Preferences.
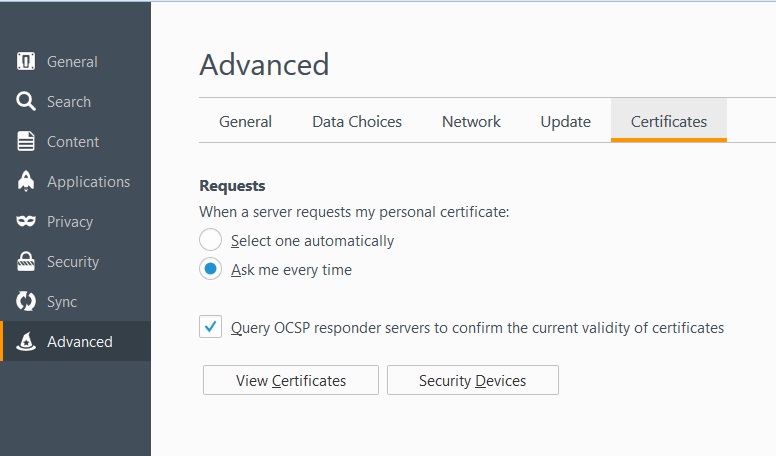
Choose the tab Advanced, subsection Security, as it shown and click on View Certificates.
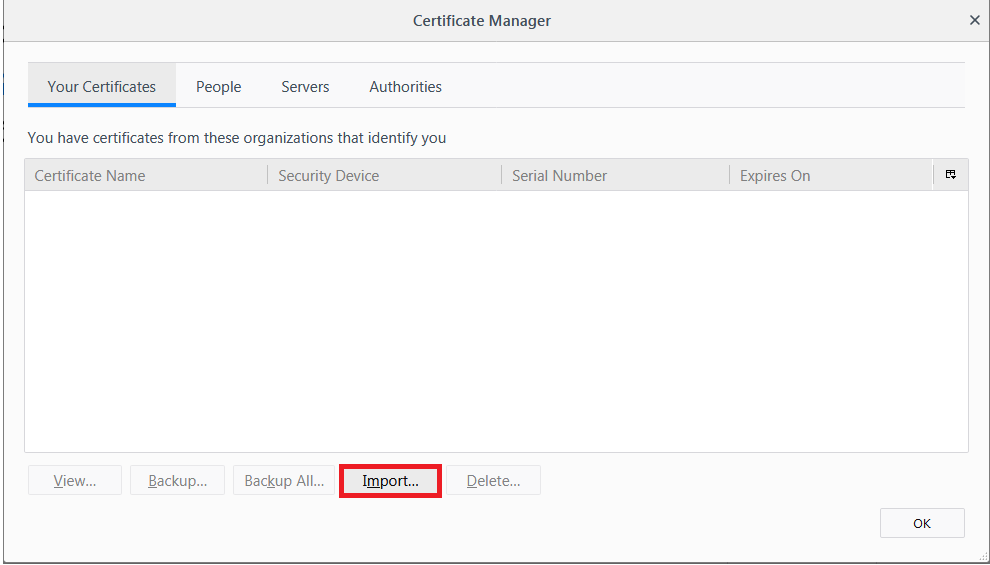
Choose the tab Your certificates and click on Import.
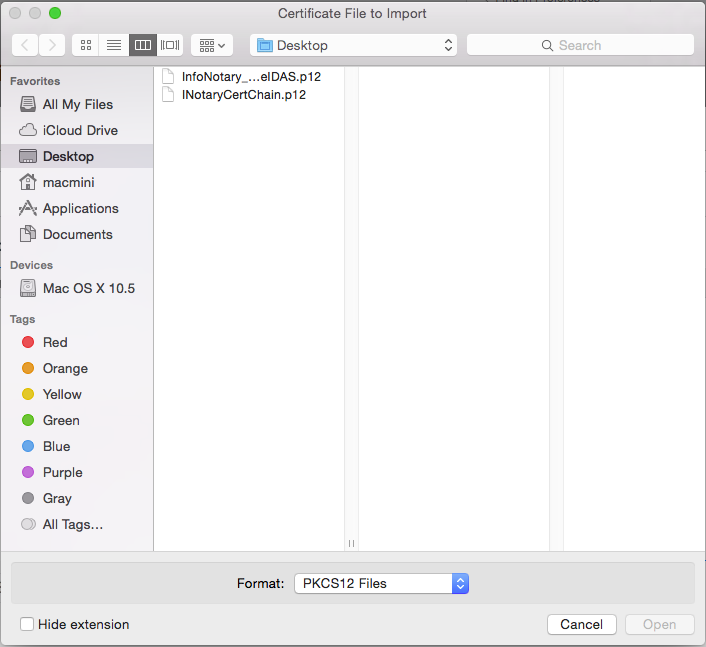
Specify the path to certification chain - InfoNotary_Qualified_eIDAS.p12
Leave the field blank and click OK.
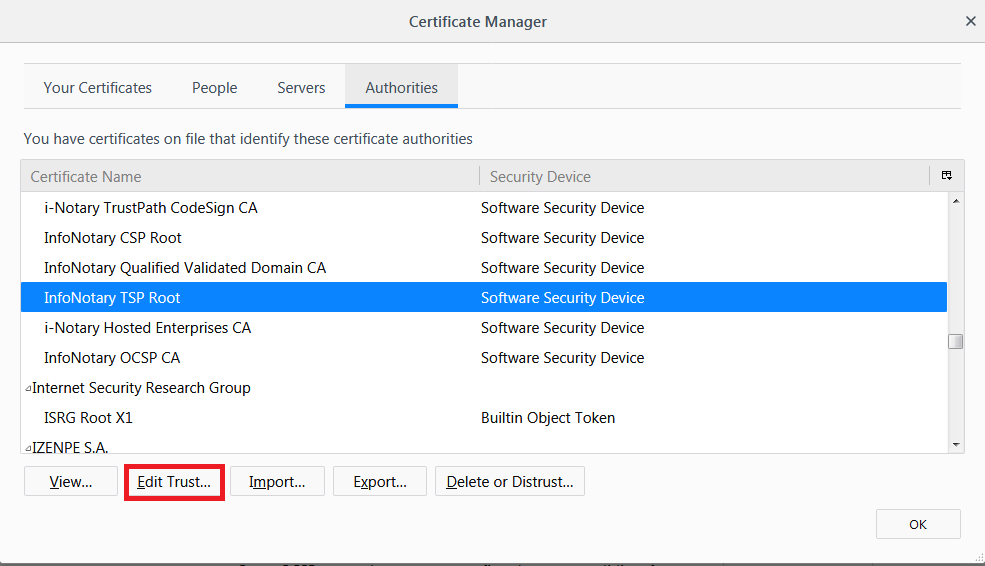
Newly installed certificates can be found in section Authorities.
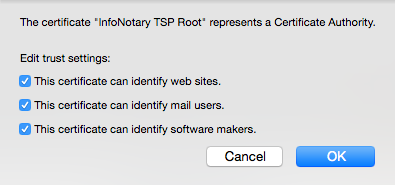
In Mozilla for every certificate of a Certification Authority (CA) the user must choose a level of trust. This is done by selecting the certificate and clicking on Edit Trust. The easiest way to do this setting for the certificate "InfoNotary TSP Root" select three possible options. This will make all the InfoNotary trusted certificates for all operations.
Install software security module
In order to use you digital certificate with Mozilla based applications like Firefox, Thunderbird etc., you must register PKCS#11 module, for your smart card. It is nessesary to install the drivers for the smart card before that.
Start Mozilla Firefox. From menu choose Preferences.
Choose tab Advanced, then Security, as it is shown on the picture and click Security Devices.
From here the procedure is analogical for all Mozilla applications.
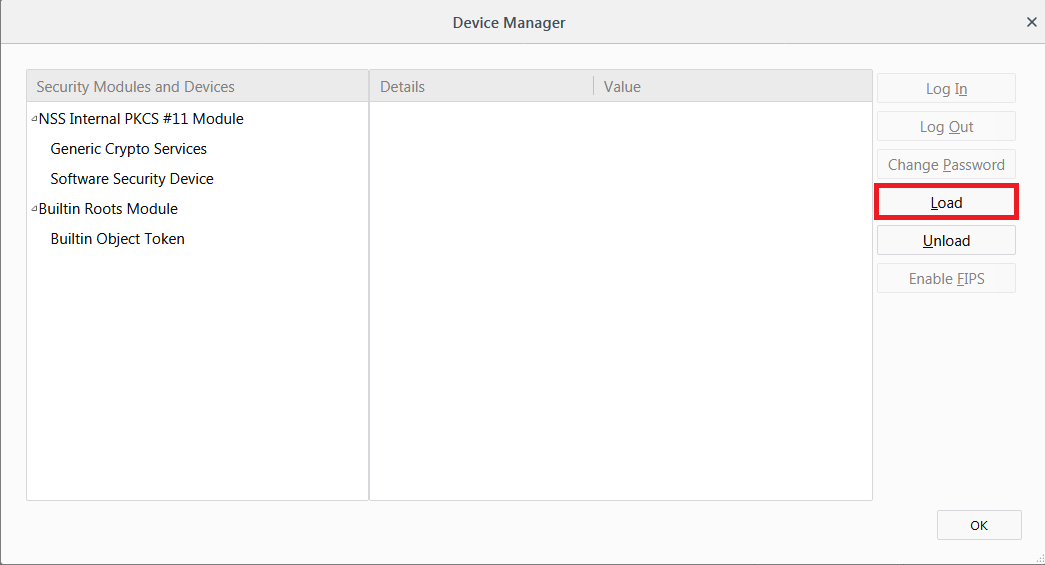
To add a new device, select the Load
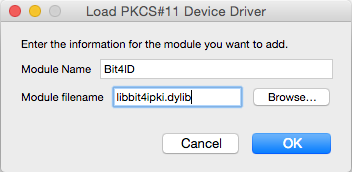
Change the name of the module (Module Name), as desired.
Select PKCS # 11 library corresponding to your smart card.
- OpenSC - /Library/OpenSC/lib/opensc-pkcs11.so
- Bit4ID - /Library/bit4id/pkcs11/libbit4ipki.dylib
- Siemens - /usr/local/lib/libsiecap11.dylib
After you click OK, your smart card will appear in the list of available devices.
