Using your digital signature in Mozilla Thunderbird for Windows
Before you proceed you must do
- If you have smart card reader and smart card from Infonotary, but you didn't install the drivers for them do the following Installation of smart card reader and smart card drivers in Windows
- IMPORTANT WHEN USING THE PRODICTS OF MOZILLA!!!: When you use Mozilla prodsucts you must know, that it uses direct access to smart cards. When we install succesfully certificates in Mozilla Firefox or Thunderbird , WE MUST NOT delete them from there, because that way we will delete them from the smart card along the public and private keys!
The prefered way Firefox and Thunderbird is through InfoNotary Configurator for Mozilla. After the extension is installed everything will be configured If you prefer to do it manually follow the steps:
Install Infonotary certificate chain
Before you can start using the certificate, you must install the Infonotary certificate chain.
Certificate chain for certificates, issued before 08.01.2018 - INotaryCertChain.p12.
Certificate chain for certificates, issued after 08.01.2018 - InfoNotary_Qualified_eIDAS.p12
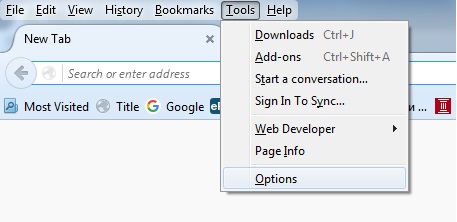
Start Mozilla Thunderbird. From Tools Choose Options.
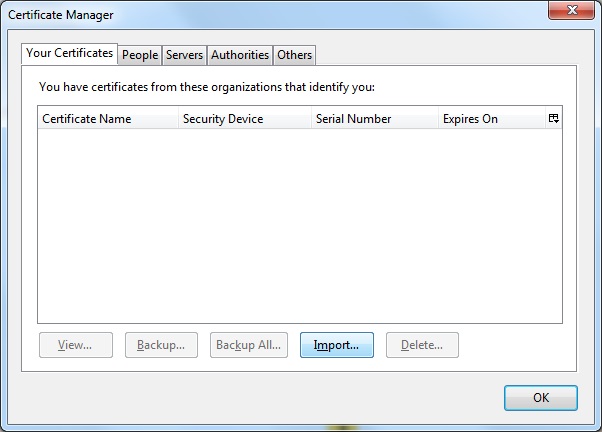
Choose Privacy, tab Security, as it shown and click View Certificates.
From here the process is analogical for all Mozilla applications.
Click the Import button and specify the path to certification chain - InfoNotary_Qualified_eIDAS.p12
Leave the field blank and click OK.
Upon successful installation of the certification chain message appears:
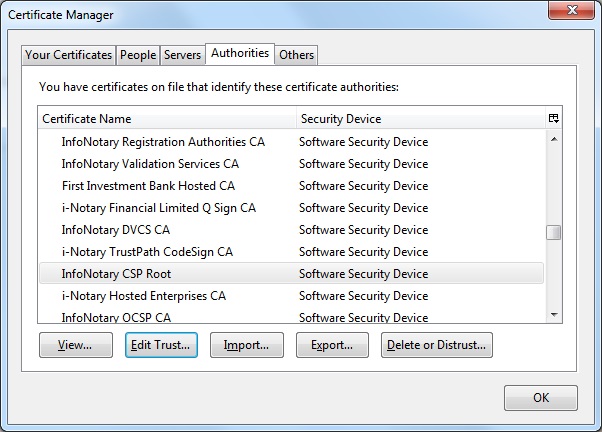
Newly installed certificates can be found in section "Authorities":
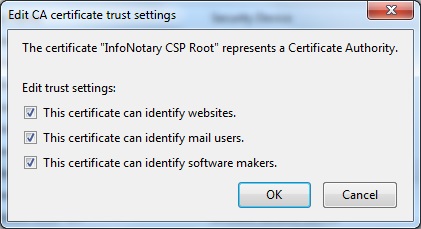
In Mozilla for every certificate of a Certification Authority (CA) the user must choose a level of trust. This is done by selecting the certificate and clicking on Edit Trust. The easiest way to do this setting for the certificate "InfoNotary TSP Root" is to select all three possible options. This will make all the InfoNotary trusted certificates for all operations.
Install software security module
Start Thunderbird from the menu Tools choose Options.
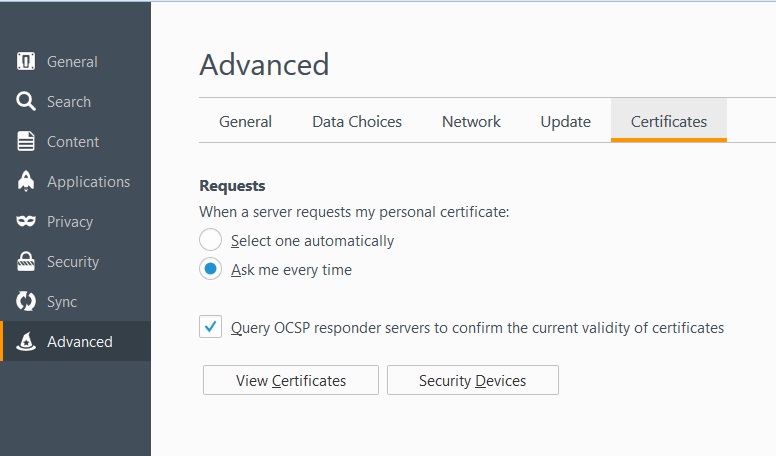
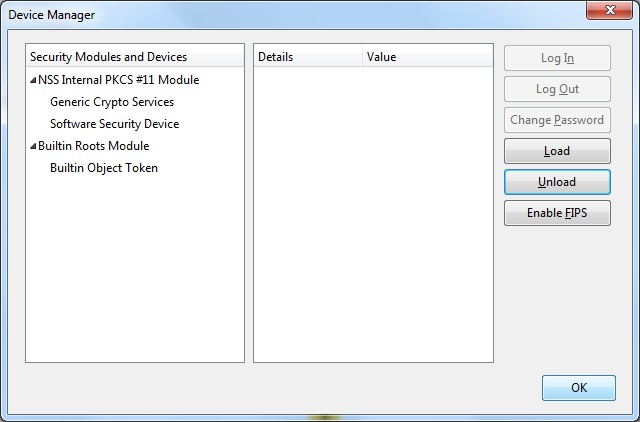
Choose tab Advanced, then Certificates, as it shown and click Security Devices.
From here the procedure is analogical for all Mozilla applications.
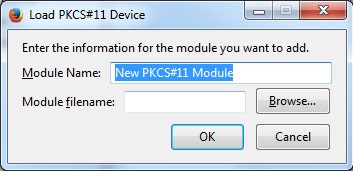
To add a new device, select the Load
Change the name of the module (Module Name), as desired.
Select PKCS # 11 library corresponding to your smart card.
- Siemens - C:\WINDOWS\system32\siecap11.dll
- Charismathics - C:\WINDOWS\system32\cmP11.dll
- Bit4id - C:\WINDOWS\system32\bit4ipki.dll
In case you use 64 bits version of Firefox or Thunderbird and Charismathics smart card, path to library is C:\WINDOWS\system32\cmP1164.dll.
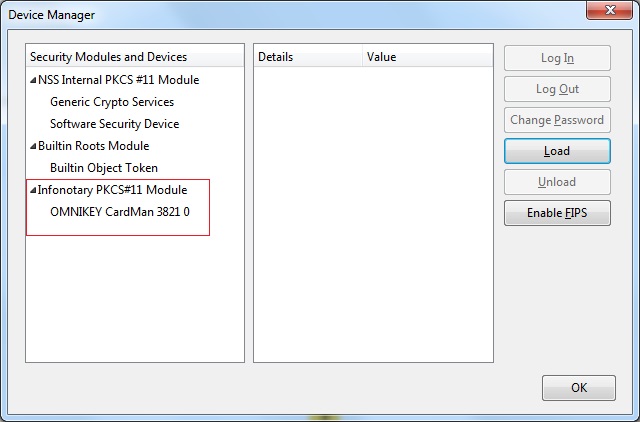
After you click OK, your smart card will appear in the list of available devices.
Configuring use profile in Thunderbird
In order for you to sign your outgoing mails, you have to associate your account with your digital signature on your smart card. To do this follow the steps below:
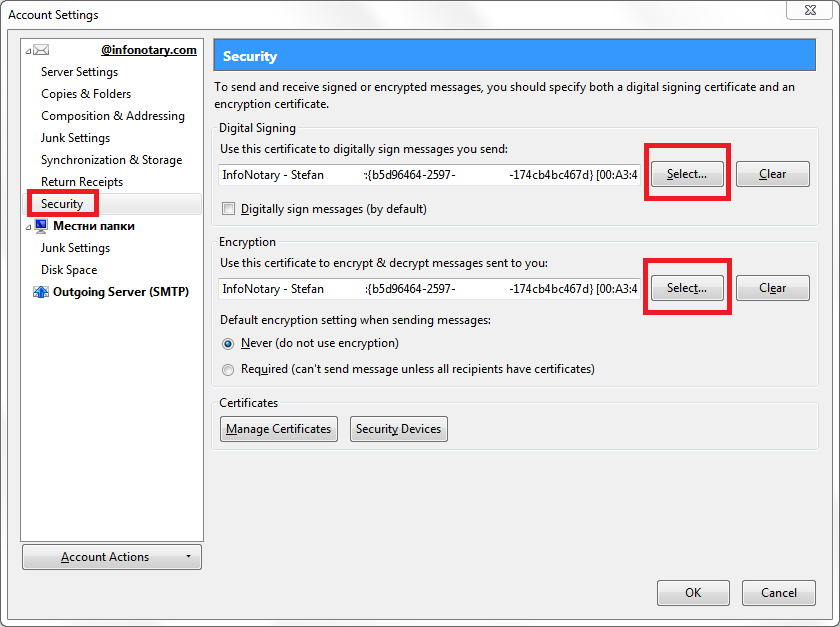
If you are using Windows, choose Tools > Account Settings > Security, and for Linux and other UNIX systems choose Edit > Account Settings > Security, as it is shown
Choose the button Select from the field Digital Signing.
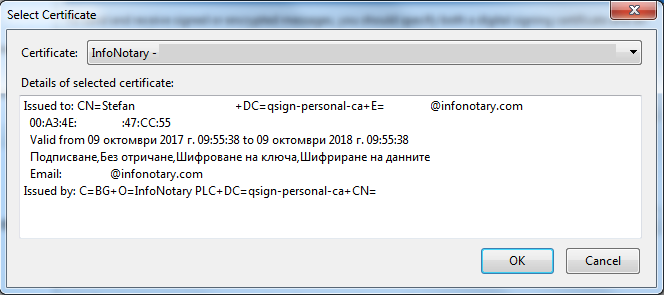
You will get a window for choosing a certificate:
Choose the appropriate certificate from the smart card and confirm by clicking OK.
If the setting Digitally sign messages (by default) is checked every message send by you will be signed with choosed certificate.
Thunderbird will offer you to choose the same certificate for decrypting messages send to you. If you dont want to be the same certificate you can choose one from the button Select in the field Encryption. Please note that not every certificate can be used for encrypting or decrypting. These options depends of the type of your certificate.
