Using your digital signature in Microsoft Outlook: Разлика между версии
Направо към навигацията
Направо към търсенето
Редакция без резюме |
|||
| (Не са показани 4 междинни версии от същия потребител) | |||
| Ред 2: | Ред 2: | ||
* If you have smart card reader and smart card from Infonotary, but you didn't install the drivers for them do the following [[Installation of smart card reader and smart card drivers in Windows]] | * If you have smart card reader and smart card from Infonotary, but you didn't install the drivers for them do the following [[Installation of smart card reader and smart card drivers in Windows]] | ||
== Set your user profile in Microsoft Outlook == | == Set your user profile in Microsoft Outlook == | ||
| Ред 9: | Ред 7: | ||
In order that you sign your e-mails you must associate your user profile (account) with your digital signature, on the smart card. This can be done this way: | In order that you sign your e-mails you must associate your user profile (account) with your digital signature, on the smart card. This can be done this way: | ||
*For version '''Microsoft Outlook 2013/2016''' | |||
Start Microsoft Outlook. | |||
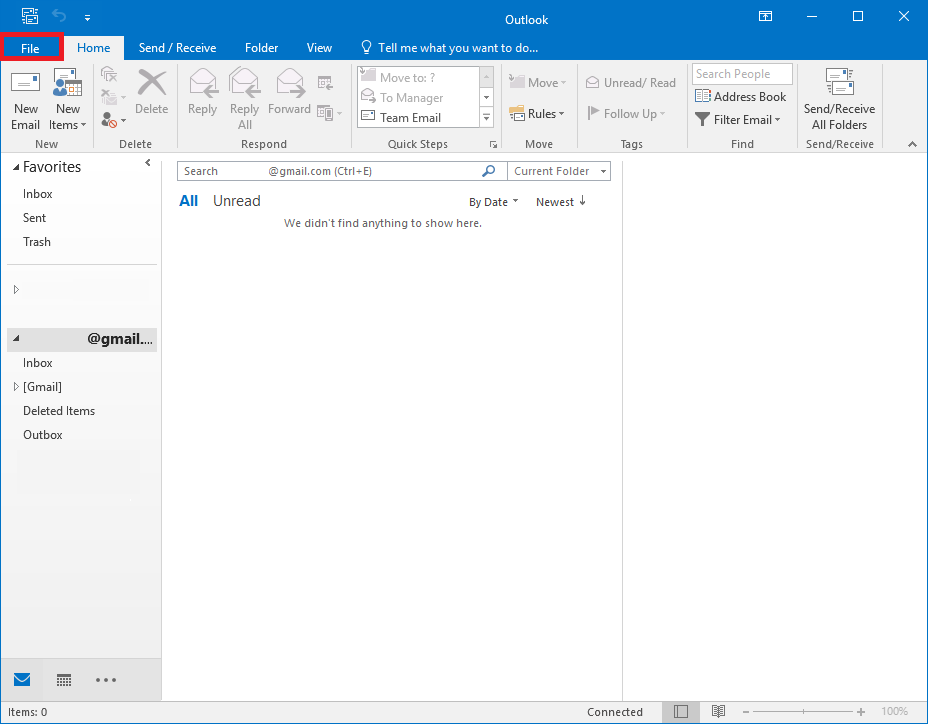
Choose '''File'''. | |||
[[Файл:Outlook2016 ConfigCertificate.PNG|750px]] | |||
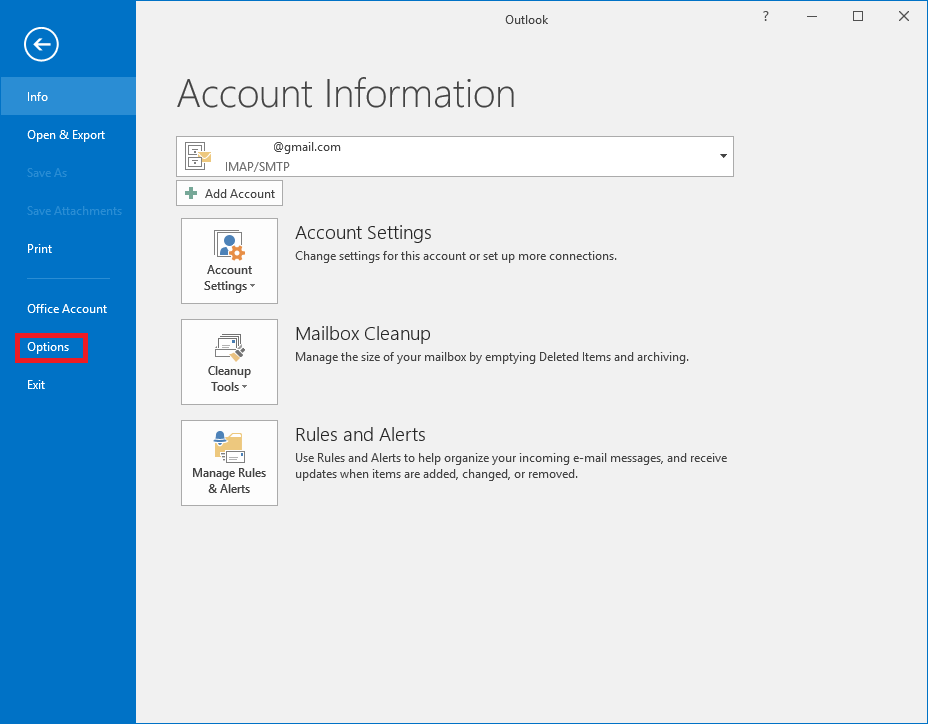
From the menu, choose '''Options'''. | |||
[[Файл:Outlook2016 ConfigCertificate2.PNG|750px]] | |||
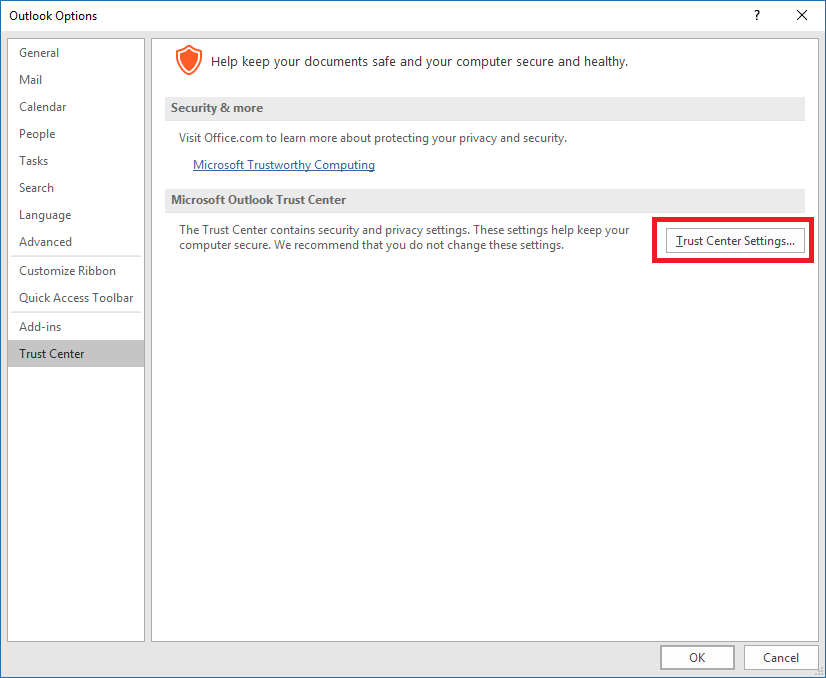
From '''Trust Center''', click on '''Trust Center Settings'''. | |||
[[Файл:Outlook2016 ConfigCertificate3.PNG|750px]] | |||
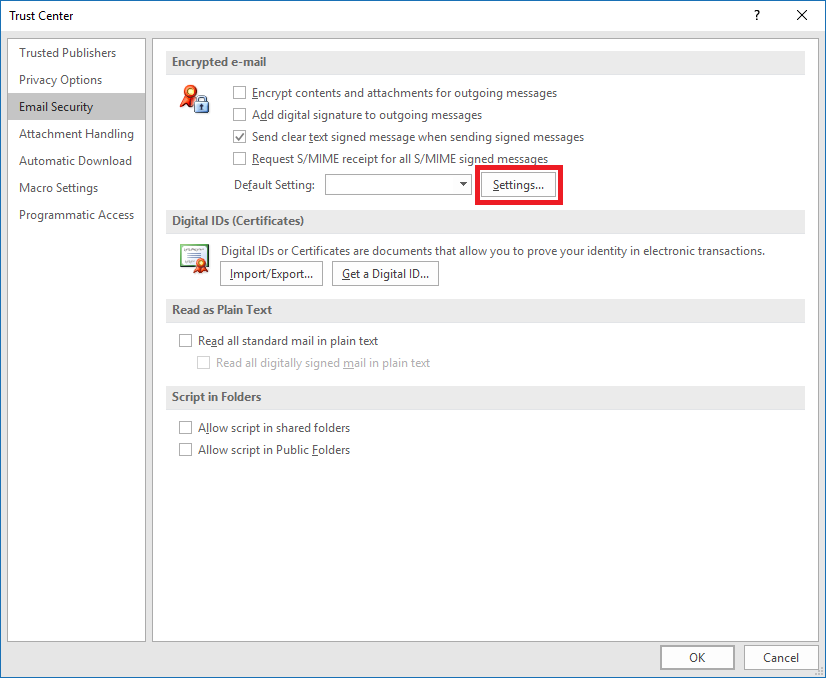
Choose '''Email Security''' and click '''Settings'''. | |||
[[Файл:Outlook2016 ConfigCertificate4.PNG|750px]] | |||
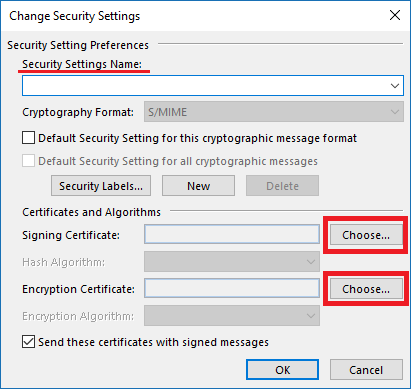
Type your e-mail in the field Security Settings Name. | |||
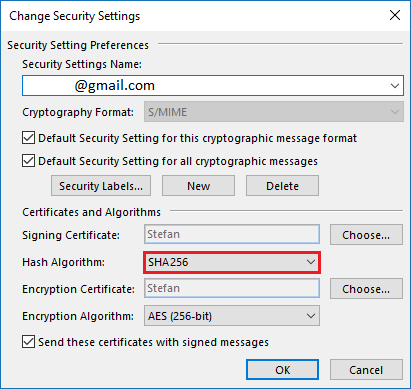
'''Choose''' your certificate, then for '''Hash Algorithm''' select '''SHA 256''' and confirm with '''OK'''. | |||
[[Файл:Outlook2016 ConfigCertificate5.PNG]][[Файл:Outlook2016 ConfigCertificate6.PNG]] | |||
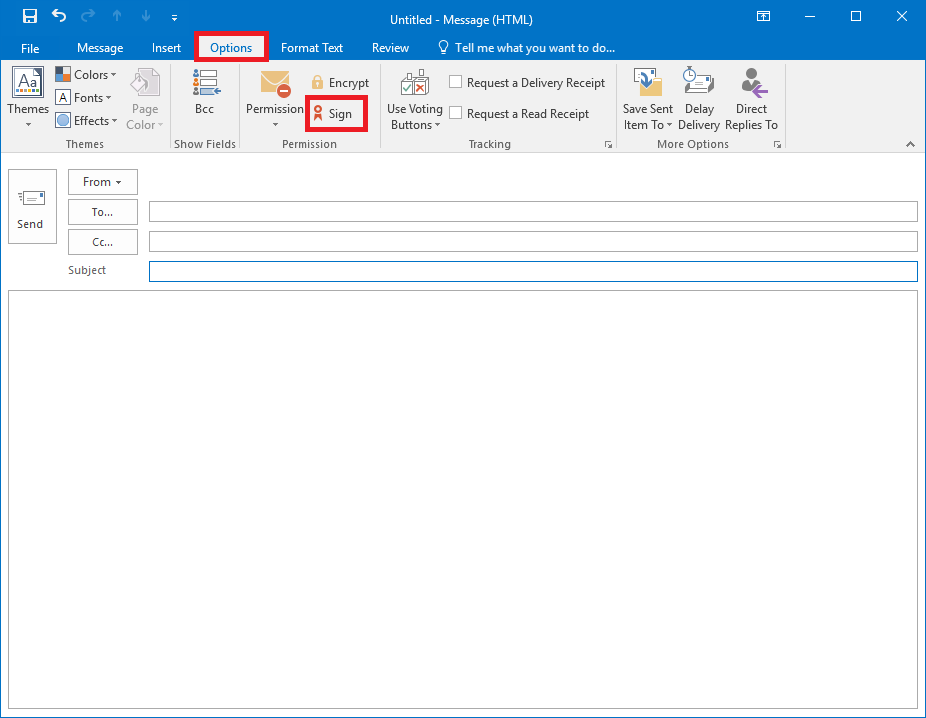
To sign a message, choose '''Options''' and click on '''Sign'''. | |||
[[Файл:Outlook2016 ConfigCertificate7.PNG|750px]] | |||
Every time when you send signed e-mails you must insert your smart card. When you send you will be prompted for PIN. | Every time when you send signed e-mails you must insert your smart card. When you send you will be prompted for PIN. | ||
[[Категория:Инсталация и използване на удостоверения за електронен подпис]] | [[Категория:Инсталация и използване на удостоверения за електронен подпис]] | ||
[[Категория:Windows]] | [[Категория:Windows]] | ||
[[Категория:Помощ]] | [[Категория:Помощ]] | ||
Текуща версия към 18:52, 1 декември 2023
Before you begin
- If you have smart card reader and smart card from Infonotary, but you didn't install the drivers for them do the following Installation of smart card reader and smart card drivers in Windows
Set your user profile in Microsoft Outlook
In order that you sign your e-mails you must associate your user profile (account) with your digital signature, on the smart card. This can be done this way:
- For version Microsoft Outlook 2013/2016
Start Microsoft Outlook.
Choose File.
From the menu, choose Options.
From Trust Center, click on Trust Center Settings.
Choose Email Security and click Settings.
Type your e-mail in the field Security Settings Name.
Choose your certificate, then for Hash Algorithm select SHA 256 and confirm with OK.
To sign a message, choose Options and click on Sign.
Every time when you send signed e-mails you must insert your smart card. When you send you will be prompted for PIN.
