Instructions for signing documents with qualified electronic signature in InfoNotary e-Doc Signer
- The instruction was made using a version of InfoNotary e-Doc Signer NG 2.0.6.1198
About
InfoNotary e-Doc Signer is a program for signing and verification of digital documents in CAdES format. The format meets the requirements of a European standard, replacing the previously used CMS / PKCS7 format.
You can download the software from HERE.
File extensions
InfoNotary e-Doc Signer adds the following extensions corresponding to the operations performed:
- .p7m - extension for attached signature, generic signature and long-term signature
- .p7s - extension for detached signature and detached long-term signature
- .tsr - extension for timestamp validation
Signing of file
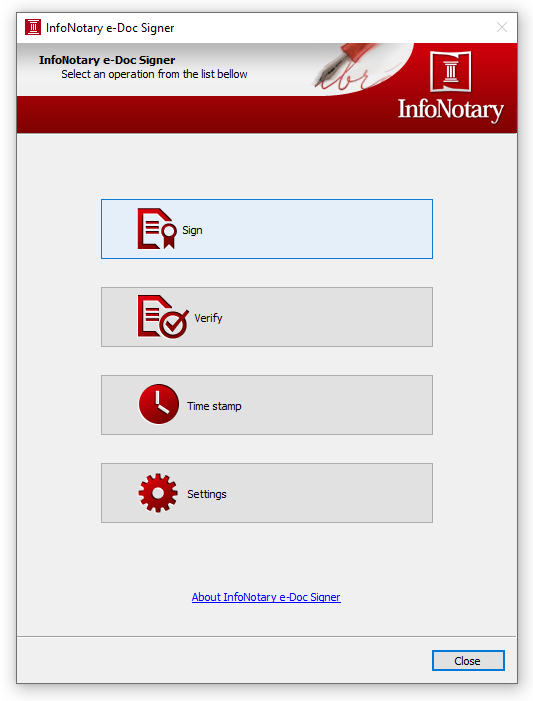
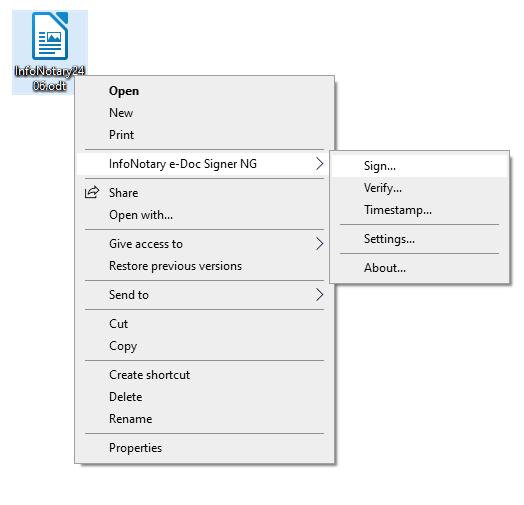
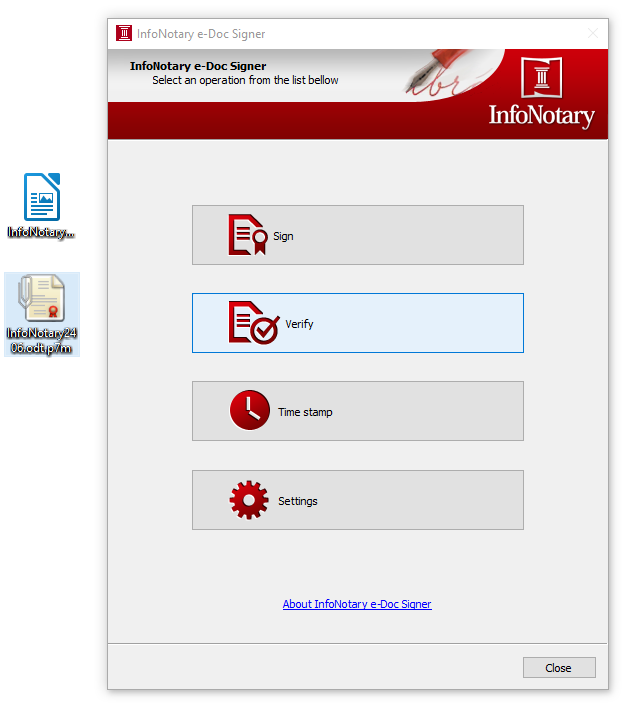
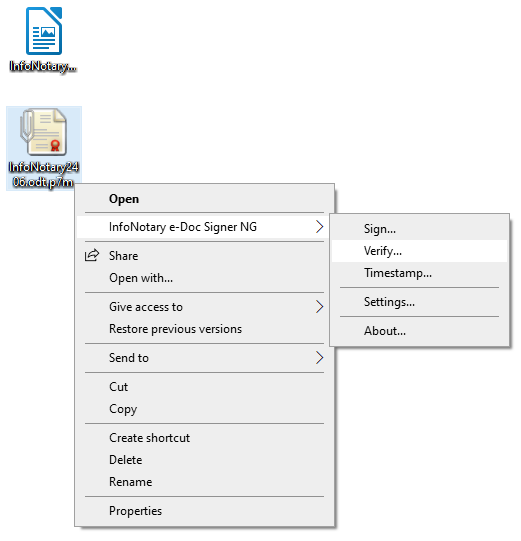
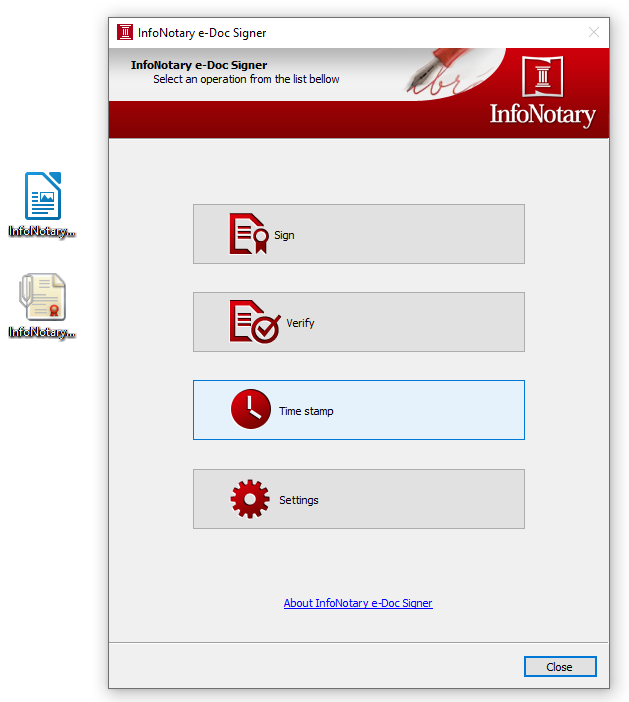
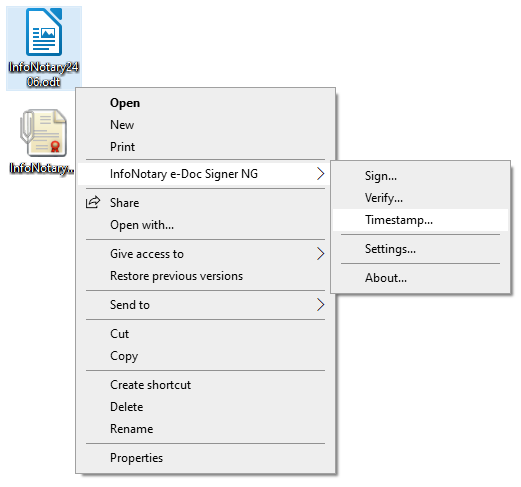
1. Start the software or right-click on the file then select InfoNotary e-Doc Signer NG > Sign.
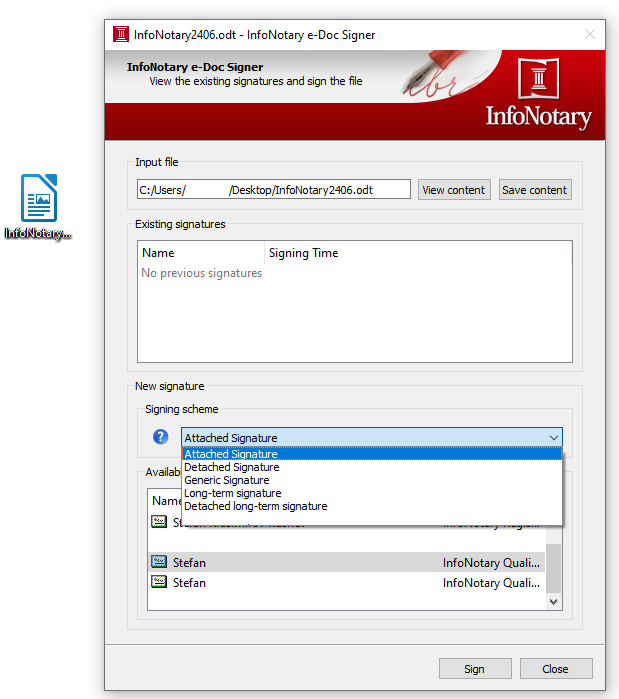
2. Choose Signing scheme.
- Attached Signature - add file extension .p7m.
- Detached Signature - add file extension .p7s.
- Generic Signature - add file extension .p7m, it contains timestamp from the timestamp server of InfoNotary, which proves the existing of the signature at the time of signing.
- Long-term Signature - add file extension .p7m, it contains timestamp from the timestamp server of InfoNotary, which proves the signature and the protected content of the document existing at the time of signing.
- Detached long-term Signature - add file extension .p7s,it contains timestamp from the timestamp server of InfoNotary, which proves the signature and the protected content of the document existing at the time of signing.
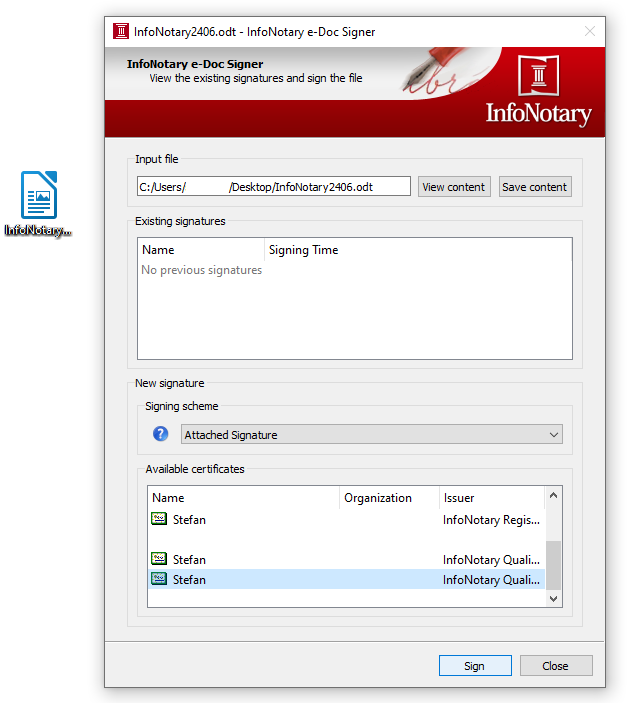
3. Choose available certificate from the list. Click Sign and dial your PIN code.
4. The software creates a file in the directory with extension that corresponding to the signing scheme that you've chosen.
Verifying a signed file
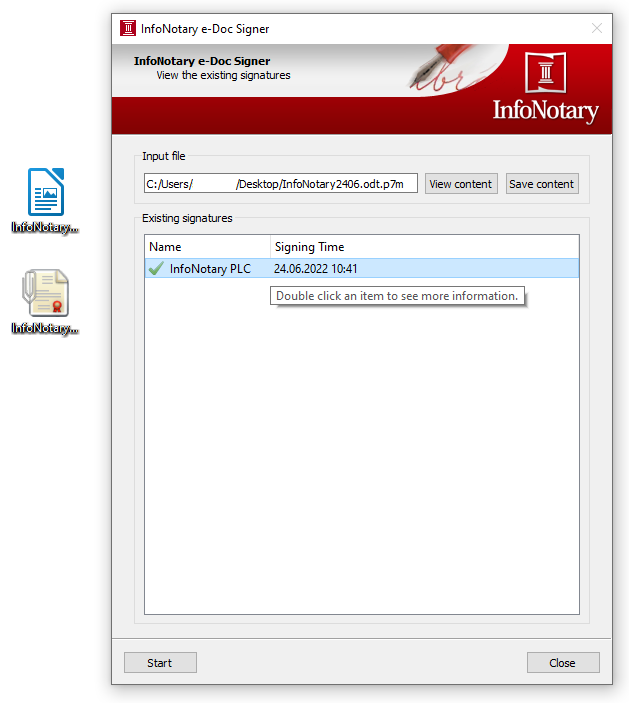
1. Start the software or right-click on the signed file then select InfoNotary e-Doc Signer NG > Verify
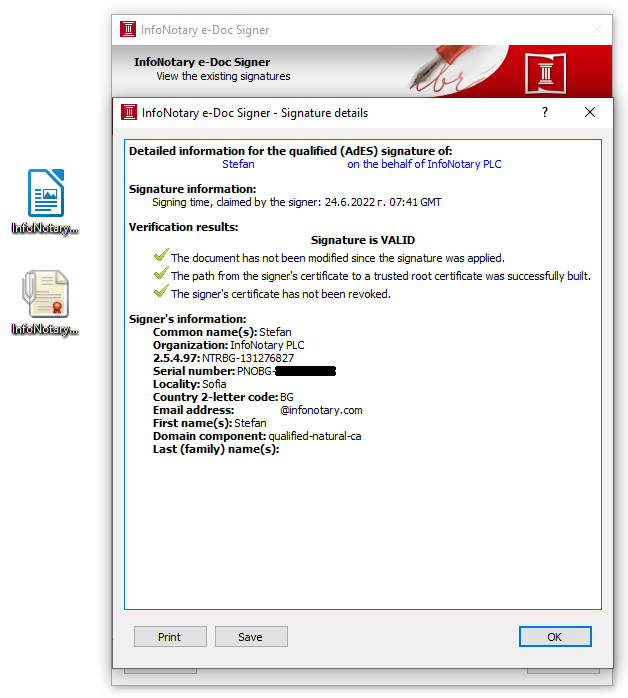
2. Double click on the added signature, to see more details.
- For verification you can also use InfoNotary qualified validation service
Timestamping
The software uses the timestamp server of InfoNotary.
1. Start the software or right-click on the file then select InfoNotary e-Doc Signer NG > TimeStamp
2. The action creates timestamp signing from independent server (not from your local computer), and create file in the directory with extension .tsr.
